The growth in global demand for cocoa puts the Philippines in a great position to fill the demand gap and be a significant player in the international chocolate market. Given the climatic conditions and soil quality that suits well to growing cacao. So let us explain how cacao production in the Philippines and how you can enter the business.
Interest is also growing among local farmers as international demand for such crop yield outstrips what production can deliver. Due to such demand, price has been on an upward trajectory and has gained both interest and attention among growers to make the switch. With the optimistic attitude towards prospects of sustainable cacao production in the Philippines, the country will be able to compete among the world’s largest suppliers of cocoa products.
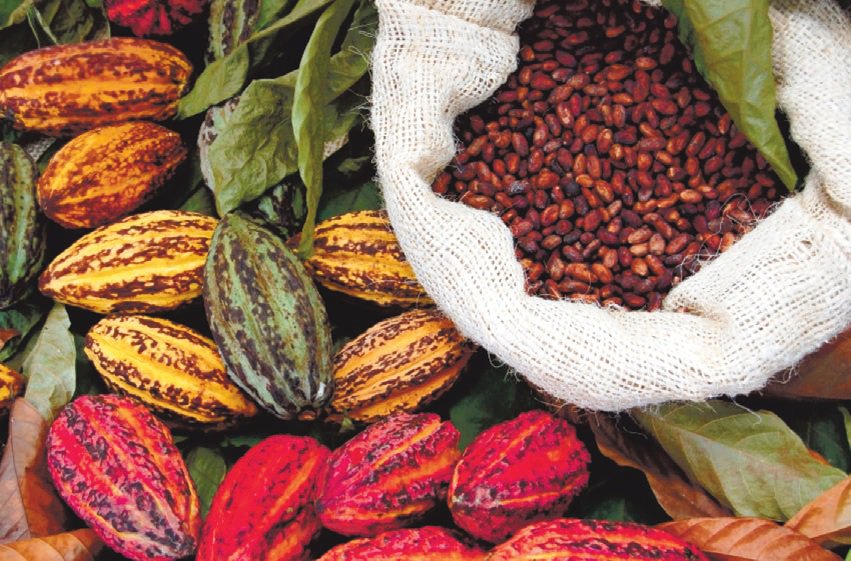
Statistics show the country’s supply reached a deficit of 44,349 metric tons against local consumption of 50,000 metric tons in 2005. But with growth in world price of cocoa reaching new highs, cacao production in the Philippines is seeing an expected boost. As an equatorial crop, cacao is well suited to grow this crop.
Table of Contents
Selection of cacao varieties
There are many varieties of cacao but the National Seed Industry Council has registered and approved only 9 varieties/clones of cacao. NSIC approved clones are the following:
- BR 25
- K 1
- K 2
- UIT 1
- ICS 40
- UF 18
- S 5
- K 4
- K 9
Some of the nine varieties are as follows:
BR25 (CC-99-05)
- Reddish (red with green) pod color when still young that turns yellow as it matures.
- Leaves are elliptical in shape with wavy leaf margins.
- Leaf length and width ratio is 11.0 cm is to 4.04 cm.
- First flowering starts at 16.12 months and fruiting follows at 17.70 months.
- Pod shape is AMELONADO characterized by an ovoid shape without a prominent point and with a diameter greater than 50% of the length.
- It has superficial ridges, and a usually smooth surface, although they can be rugose in some cases with a small bottleneck.
- Pod index is 23.1 pods/kg of dried beans. Pod length is 17.02 cm and has a width of 7.07. The number of beans per pod is 27 and violet in color
- Resistance to insect pests and diseases is moderate.
ICS 40
- Leaf shape is elliptical with wavy leaf margin.
- Leaf length and width ratio is 29.95 cm is to 10.01 cm.
- Starts to flower at the age of 17.63 months and fruiting follows at 19.63 months.
- Pod shape is Cundeamor describe as a variety with elongated cylindrical fruit with ridges, a rugose surface, pronounced bottleneck and sharp point.
- Pod length and width ratio is 16.02 cm is to 9.45 cm. Pod color is green when young and turns yellow when mature with wall thickness of 1.35 cm.
- Pod index is 16.2 pods/kg with 44 beans per pod. Canopy diameter is 195 cm. Bean is striped.
- Moderately resistant to insect pests and diseases
UIT 1 (CC-99-02)
- It has an elliptical leaf shape with wavy leaf margin.
- Leaf length and width ration 22.36 cm is to 8.13 cm.
- It flowers at the age of 16.80 months in the stage of first fruiting.
- Pod shape is Cundeamor. Pod length is 20.07 cm and width of 8.65 cm.
- Pod is yellow when old from the original color of green color of green when still young with wall thickness of 1.02 cm.
- Pod index is 21.69 pods/kg having 46 beans/pod. Bean is violet in color.
- Canopy diameter is 278 cm. Moderately resistant to insect pests and diseases.
K 1
- It has en elliptical leaf shape with smooth leaf margins.
- Leaf length is 31.31 cm with a mean width of 13.44 cm.
- It flowers at 23.20 months and bears fruit at 25.10 months.
- Pod shape is Amelonado with a superficial ridges and a smooth surface.
- Rugosity also appear in some cases. Pod index is 19.20 pods/kg of dried beans
- Pod length is about 17.97 cm and has width of about 8.67 cm.
- Pod is red in color while still young and becomes yellow/orange when mature.
- It has a pod wall thickness of around 1.80 cm. Bean color is violet and a hundred beans weigh about 182 grams. It is moderately resistant to known insect pests and diseases.
K 2
- Leaf shape is elliptical with smooth leaf margins.
- Leaf length is 32.73 cm with a mean width of 12.52 cm.
- It flowers at 21.10 months and bears fruit after three months or at 24.12 months.
- Pod shape is Amelonado and is red in color while still young and becomes yellow/orange when mature.
- It has a pod wall thickness of around 1.40 cm with 34 beans per pod.
- Pod index is 25 pods/kg of dried beans.
- It is moderately resistant to known insect pests and diseases.
Propagation and nursery establishment
In any crop, good production and income generation start with ensuring the best quality available for the variety of the crop being produced. Aside from choosing the variety, propagation techniques and nursery management will be described in this section.
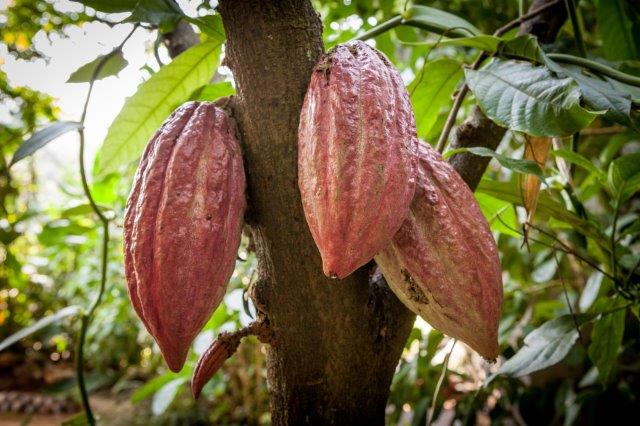
Propagation by seeds
- Collect seeds only from ripe and healthy pods.
- Select seeds that are uniform in size. Discard seeds that are swollen and of different shape
- Select bigger seeds since the possibility high that they would produce vigorous and fast growing seedlings are high.
- Remove mucilage that covers the seeds by rubbing the seeds with sawdust or sand.
- Wash the seeds to effectively remove the mucilage.
- Cacao seeds are sensitive to fungal attacks and could lead to non-germination. It is best to soak cleaned seeds in fungicide solution for about 10 minutes. Follow strictly instructions indicated in labels.
- Spread the seeds on wet sacks and cover with wet newspaper for 24 hrs.
- Keep it moist but well ventilated to avoid formation of fungi.
- Start collecting seeds that show sign of germination (a pig tail-like root appears on one side). Usually, germination starts after two days.
- Sow the pre-germinated seeds not more than 1 cm deep in prepared polybags. Be sure seeds are sown with the pigtail-root pointed downwards.
- Use select 8″ x 10″ polybags. The soil must reach 2 to 3 cm from the top of the plastic bag.
- Potting medium
- mix completely composted organic materials to improve the soil characteristics such as water holding capacity, nutrient content and soil texture.
- If possible sterilize soil by boiling soil with water in drums or other convenient containers. In some cases, spraying formaline solutions also help sterilize soils. Cheapest way to sterilize soil is the use solar drying.
- Loamy to sandy loam soils are the most suitable medium in terms of physical property for raising seedlings.
- Liming is used for soils with less than pH 5
Nursery establishment and management
Nursery establishment for cacao seedling are similar to most tree crop nurseries. Young seedlings will require ample shading, constant supply of clean water and drainage. There are also other requirements written in the books but the ones stated here are general characteristics of nursery good for cacao seedlings.
- Choose site which are near roads so that new roads will not be necessary
- Choose flat grounds. Work area must not entail more effort from uneven ground work place.
- Availability of quality water sources like good water table for shallow wells, presence of irrigation canals or other natural water source like river or creeks. Also, free from saline waters.
- Free from water-logging and presence of nearby drainage facilities
- For cacao seedlings, shading material is a must. 0 to 2 month old seedlings require 70 to 80% shade. However, gradual removal of shading is recommended to prepare seedlings for field planting. Shading materials may use materials in the vicinity of the nursery itself. This is to avoid additional expenditures.
- The period of keeping the seedlings in the nursery affects the arrangement of the bags. Polybag arrangement must be systematically carried out to facilitate maintenance and grafting. Normally, a twin row with alternate path of 45 cm in width is recommended. In order to enhance the seedling growth and to avoid the seedling etiolation, the seedlings are usually spaced further apart from each other when the seedlings are 2 to 3 months old.
- The distance is 25 to 30 cm apart starting from the middle point of the polybag. The distance gradually increases when the seedlings are kept in the nursery for a longer period.
- Weeding: Weeds do not normally cause problems in the nursery and those that appear can be removed without much expenditure on labor. On the other hand, weeds growing along spaces in between the blocks may be controlled by cutting down with scythes. The use of herbicide is not recommended. Therefore weeding could be done manually or by mulching with available materials such as rice hull.
- Fertilizer application is carried out after the first leaf hardens and should be based on the result of soil analysis. If analysis is not available, incorporate 15-35 grams of diammonium phosphate (18-48-0) per bag depending on the size of polybag. The use of granular fertilizer is also done when the leaves are dry to avoid leaf scorching.
- Culling/Selection: To ensure uniform growth and development of the seedlings to be planted in the field, cull out the poor-growing seedlings in the nursery. This practice may be carried out by removing the bags containing seeds which did not germinate and small, crinkled seedlings.
- Transplanting: To reduce the seedling shock during transplanting, it is necessary to rotate the polybag to a few degrees one week before field planting. It is done for the seedlings whose leaves have hardened and especially for those which roots have penetrated the ground. Watering has to be done for a few days later. Field planting must be started at the onset of the rainy season. Unless irrigation is available, field planting during the dry season is not advisable.
Vegetative Propagation
Vegetative propagation gives more advantage in terms of reproduction of true-to-type trees, more uniform growth, early to bear flowers, and the clone perpetuates most if not all important characters of the original seedling mother tree like pod value, bean size, fruit wall thickness and others. Major consideration in vegetative propagation is the use of the selected varieties mentioned above.
Types of Vegetative Propagation
Patch Budding – This is the propagation of true-to-type trees using buds from any of the nine NSIC approved clones.
Nodal Grafting – Propagation on the sides of the seedling using nodes.
Conventional cleft grafting – This propagation technique is similar to the procedure used in grafting mangoes. Rootstocks are cut horizontally leaving only two leaves behind. Scion of selected variety is attached to rootstocks with an inverted V shape and fastened to each other using thin plastic sheet covering all wounds to prevent drying.
The success factors for all types of grafting and budding are:
- Use healthy bud wood with active buds
- Use budwood within 2 days of collection and store and transport in moist and cool conditions
- Do not collect bud wood from trees that are recovering from heavy cropping
- Make sure bud wood is of right age and thickness for the rootstock
- Only use a sharp knife and keep it only for grafting or budding- nothing else.
- Clean knives and secateuers and other tools with alcohol, before and after grafting and budding, to minimise disease transfer
- Do not place tools onto the ground
- Avoid grafting in very hot and very dry periods, and also in very wet periods.
- Make sure rootstock are the right age and condition for grafting and budding
- Manage shade and water very carefully
- Make a secure and evenly shaded nursery.
Planting and Farm Establishment
Soil Requirement
- Best soil is made-up of aggregated clay or loamy sand with 50% sand, 30-40% clay, and 10-20% silt.
- Deep soil, about 150 cm, highly favors the growth of cacao.
- pH = 5.0 to 6.5
Climatic Requirement
- Ideal rainfall for cacao cultivation ranges from 1250 to 3000 mm per annum, preferably 1500-2000 mm with dry season of not more than 3 months.
- Temperature ideal for cacao lies between a mean maximum of 30-32°C and mean minimum of 18°C.
- Altitude of the area should lie between 300-1200 meters above sea level. Suitable temperature is generally found in an altitude up to 700 m.
- Cacao thrives best in areas under Type IV climate which has an evenly distributed rainfall throughout the year.
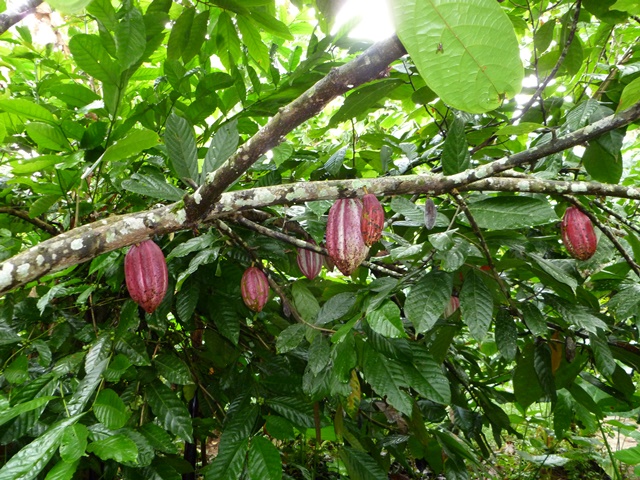
Establishment of shade crops
The leaves of the cocoa seedlings are tender and will be burnt by direct sunlight. Therefore, in order to protect them and ensure their survival and health, the seedlings must be shaded from direct sunlight during the first few years. Direct sunlight shuts off the ability of cocoa leaves to produce carbohydrates through photosynthesis. Carbohydrate is the source of energy for growth. If no energy is produced, the tree cannot grow or produce cocoa pods.
Only older cocoa trees can survive the direct rays of the sun. The upper leaves, which receive direct sunlight, shade the lower leaves that provide energy for the tree and the cocoa fruit to grow. However, if there is too much shade, cocoa leaves cannot perform photosynthesis and there is no energy for growth.
Newly planted cocoa trees need 75% shade (25% direct sunlight overall) during their first year. This can be reduced to a 50% level of overall shade in their second year. After that, the pod bearing cocoa trees need to be shaded only about 25% density of direct sunlight for the rest of the cocoa tree’s life span.
Permanent shade crops that have a thin canopy, tall trunk and do not defoliate seasonally are ideal to intercrop with cocoa trees for long periods. Some suitable crop bearing varieties are coconut, cashew, longan, durian, mango and mangosteen. Both cacao and shade trees can be planted at 6 x 3 m as in Figure below.
In the case that shade crops (both temporary and permanent) do not create enough shade for cocoa seedlings growth, temporary structures can be made from other, easily available materials such as palm fronds, sugar cane leaf, and etc.
Permanent Shade Plants
| Name | Also known as |
|---|---|
| Leuceana | Ipil-ipil |
| Gliricidia | Madre de Cacao |
| Jackfruit | Langka |
| Lansones | Lansones |
| Marang | Marang |
| Durian | Durian |
| Cashew | Kasoy |
| Mango | Mangga |
| Longan | Longgan |
| Pomelo | Pomelo, Boongon |
| Coconut | Niyog, Lubi |
Temporary Shade Plants
| Name | Also known as |
|---|---|
| Sesbania | Sesbania |
| Crotalaria | Crotalaria |
| Flemingia | Flemingia |
| Cassava | Kamoteng kahoy/ Balanghoy |
| Maize | Mais |
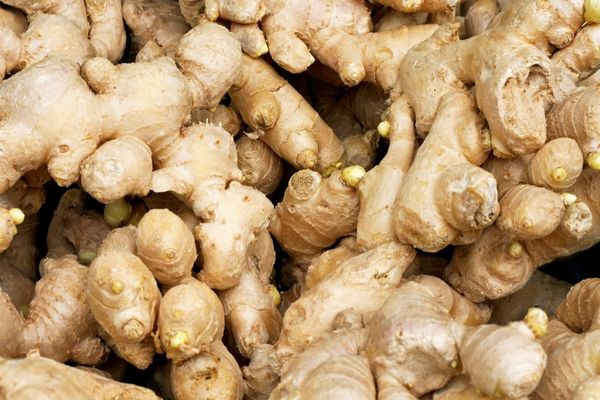
| Ginger | Luya |
| Abaca | Abaca |
| Papaya | Papaya/Kapayas |
Vines
| Name | Also known as |
|---|---|
| Pepper –black | Paminta |
| Dragon fruit | Dragon fruit |
| Vanilla | Vanilla |
Ground Covers and Manure Crops
| Name | Also known as |
|---|---|
| Lemon grass | Tanglad |
| Peanut | Mani |
| Sweet potato | Kamote |
Staking and spacing
- Planting points are to be marked with stakes using suitable size and length of cable wire or guide from straight line planting.
- Most common distance :
- High density 1.5 to 2.0 x 6.0 m = 2,300 trees/ha. Double hedge row
- Low density = 3 x 2m = 1666 plants/ha or 2.5 x 2.5 m = 1600 plants/ha
- Depending on the shade from existing trees and tree crops, and soil fertility, the planting density of cocoa varies from 400-1100 plants/ha. In the case of intercropping in coconut and cashew, the density of cocoa averages about 600 plants/ha. Basal fertilizers are very important to enhance the growth of young cocoa trees in the establishment stage.
Planting
- Right time to plant is during early morning or late afternoon.
- It is not advisable to plant seedling with young and soft flush leaves as they are susceptible to sunburn, planting shocks or stress.
- Best season to plant in the field is during the onset of rainy season.
- Size of the hole should be big enough to accommodate the ball of the soil mass.
- Normally, a hole of 30 cm wide x 30 cm long and 30 cm deep.
- In holing, the surface of soil should be separated from the sub-soil.
Care and maintenance
Weeding of cacao crop
Manual by ring weeding method 1 meter radius from the stem as removed with the use of sickle.
Fertilization of cacao crop
In the absence of soil analysis (PCARRD, 1989) recommended rates of fertilizer application for various ages of trees as shown below.
Fertilizer Application / Plant (g)
| Months after field planting | N | P | K |
|---|---|---|---|
| 1 | 6.4 | 6.4 | 6.4 |
| 4 | 8.5 | 8.5 | 8.5 |
| 8 | 8.5 | 8.5 | 8.5 |
| 12 | 12.8 | 12.8 | 12.8 |
| 18 | 17.0 | 17.0 | 17.0 |
| 24 | 27.0 | 27.3 | 38.5 |
| Total | 80.5 | 80.5 | 91.7 |
Pruning
- Pruning is done to increase cacao production
- Reduce pest and diseases infestation
- Control the shape and height of the tree
- Control the shape and height of the tree, to ensure easy access for harvesting.
Cacao pruning steps
- Pruning cocoa trees can increase production, make tree maintenance easier, and reduce pest infestation and diseases
- Maintenance pruning starts with regularly removing the low hanging branches or those that grow downwards.
- Second remove regularly the chupons on the stem.
- Also remove all shoots and additional branches that are within 60 cm of the jorquette. Removal of shoots is necessary to avoid production of non-essential branches.
- Furthermore, it is important to remove regularly all dead, diseased and badly damaged branches.
- Top pruning of the highest branches ( up to 4 meters) in order to keep the tree short for easy regular harvesting and maintenance.
- In addition to this it is recommended to open the center of the tree by pruning in the shape of a champagne glass in order to reduce humidity and increase sunshine.
- The cocoa pod borer does not like the sunshine and increased wind. The additional sunshine to the stem will increase flowering as well.
- The best time for heavy pruning is after the high production cycle, approximately one month before the rainy season. After pruning it is recommended to apply fertilizer.
- Pruning has to be done regularly and correctly, results in more pods on the tree with less infestation and diseases.
Rehabilitation of old cacao trees by side grafting
Rehabilitation can be carried out by removal or replacement of the existing unproductive trees: through side grafting or through bark grafting. Side grafting involves the utilization of scions from plants known for high yield and quality beans to be side grafted to existing unproductive trees in the plantation.
Steps in side grafting of cacao
-
- Find the hard leaf flush from “super trees”.
- Prepare budsticks for side grafting.
- Close-up of prepared budsticks.
- Make first horizontal deep cut on the main trunk of unproductive tree.
- Shave bark downward into the cut.
- Make sure original cut is through the bark to the white wood inside.
- Make two cuts downward from the horizontal cut.
- Create “window” by peeling the bark neatly and cleanly downward to reveal the white sapwood (cambium) inside.
- Insert budstick into window as illustrated
- Tie window closed with straw (younger tree).
- Here, graft is tied securely with straw (older tree).
- Cover side graft with plastic bag and tie tightly against the tree with raffia. Remove plastic bag after one month.
- Another younger tree with side graft covered with plastic bag and tied tightly against the tree with raffia. Remove plastic bag after one month.
- Repeat the same steps for the 2nd and 3rd. Each tree should have three grafts to begin with. Be sure each graft are at least 30 cms apart and opposite each other.
- Cut the main tree with chainsaw at least 1 foot above the ground in a slanting manner.
- Apply Tar or paint on the cut portion
- Ringweed the stump 1 ft. around and and apply animal manure or organic fertilizer in the stump holes.
- Apply organic fertilizer and control pest & diseases regularly.


